Introduction
We’re going to make a recycling game! Catch the falling items, and put them in the correct recycling bins.

Use the arrow keys to run left and right
Press space bar to throw what you’re carrying
Get the rubbish in the correct recycling bin
Step 1: Create the character that will pick up the rubbish
Activity Checklist
- Start a new Scratch project.
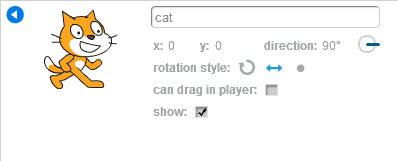
- Change the name of Sprite1 to cat by clicking on the blue
isymbol - Make sure that it will only flip left-right with the side-to-side arrow.
- Create a variable, for this sprite only, called runningspeed
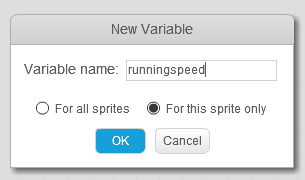
- Create a variable, for this sprite only, called maxspeed
- Create a variable, for this sprite only, called cats-direction
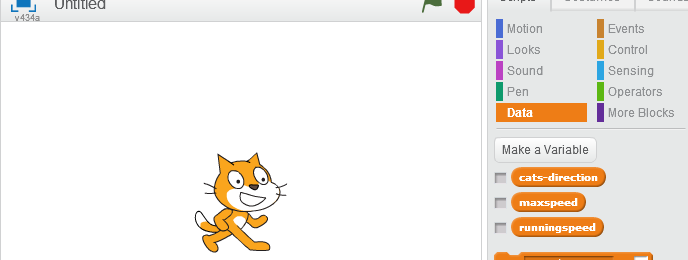
- Untick all three variables so they’re not shown on the Stage
- Use the Make a Block button in More Blocks to create a new custom block
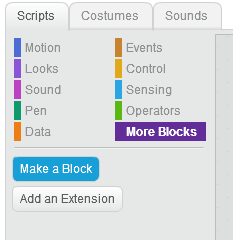
- Name the new custom block reset
Add a script to the reset block that will put the cat in the right starting place and set the speed variables
![define reset
set size to (70)%
go to x: (0) y: (-135)
point in direction (90 v)
set [runningspeed v] to (0)
set [maxspeed v] to (10)
set [cats-direction v] to (90)](8d86d8d6c879485b04dc22ac74eb8492fd98ef59.png)
- Create another custom block, called run
Add the following script to run, to make it possible for the cat to run at the runningspeed, and slow down gradually
![define run
forever
move (runningspeed) steps
if <(runningspeed) > (0)> then
change [runningspeed v] by (-1)
else
if <(runningspeed) < (0)> then
change [runningspeed v] by (1)
end
end](584effe6201300ee3bba569408655d2dc8a54e89.png)
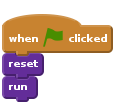
Combine these when the green flag is clicked
Create a custom block called “change direction if needed”. It should take one number input called direction
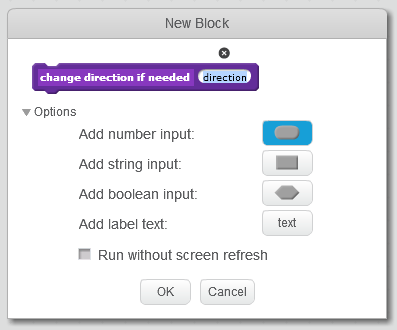
![define change direction if needed (direction)
if <not <(cats-direction) = (direction)>> then
point in direction (direction)
set [cats-direction v] to (direction)
set [runningspeed v] to <(0) - (runningspeed)>
end](e2c130847668ea31254600e5ad0e7ec7a0743353.png)
Create a custom block called speed up if possible which will increase speed, but only until the cat reaches maxspeed
![define speed up if possible
if <(runningspeed) < (maxspeed)> then
change [runningspeed v] by (2)
end](088423d0b01b1c67df9b0b4fd641aab98858e2e9.png)
Start to bring these together with a new custom block called handle button press which takes one number input called button-direction
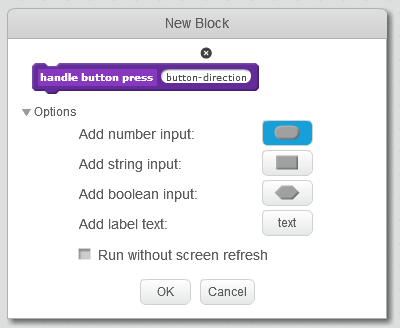
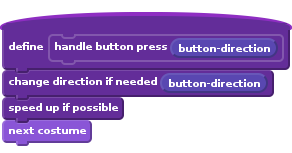
Finally, add a script block that will use these custom blocks to control the cat’s running
![when green flag clicked
forever
if <key [left arrow v] pressed?> then
handle button press (-90) :: custom
end
if <key [right arrow v] pressed?> then
handle button press (90) :: custom
end](bd333c03913a27af47b3cdd6c407842d3b73e8fe.png)
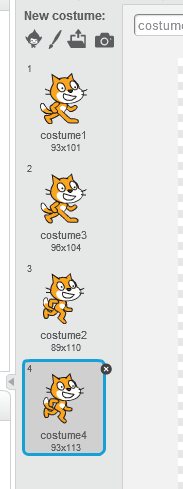
Duplicate each of the cat’s two costumes. We want two of the first costume, and two of the second costume. This will prevent the running animation from flickering too much
Save your project
Test Your Project
Click the green flag.
- Use the left and right arrows to run from side to side
- If you let go of the arrow key after picking up speed, the cat should slow down gradually instead of stopping instantly
- If you switch directions while running, the cat should skid in the wrong direction briefly before switching
Things to try
- Try adjusting the speeds - the number in speed up if possible controls how fast the cat accelerates, the maxspeed value in reset controls the cat’s top speed.
Step 2: Add falling rubbish
It’s time to make items for the cat to recycle!
Activity Checklist
Prepare the sprite
- Upload a new sprite, choosing Resources/can.png
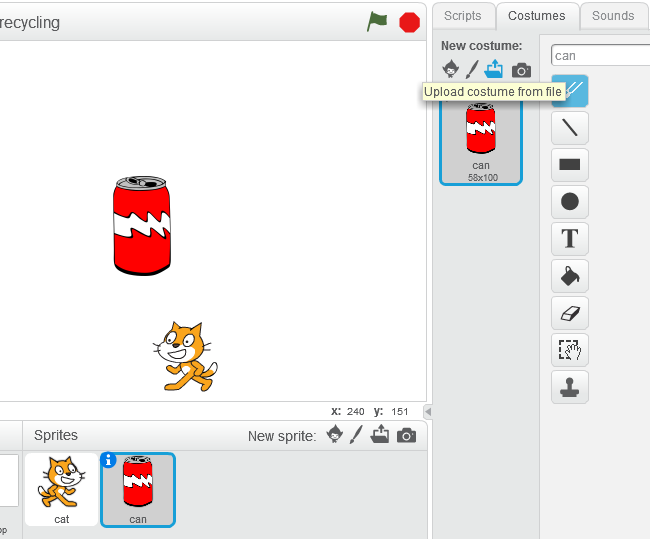
- Switch to the Costumes tab, and upload another costume using Resources/jar.png
- Upload another costume using Resources/newspaper.png
- The sprite should now have three costumes: a can, a jar and a newspaper
- Click on the blue
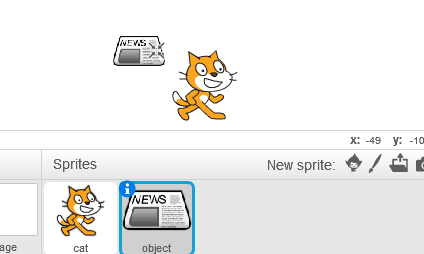
inext to the sprite, and rename the sprite to be called object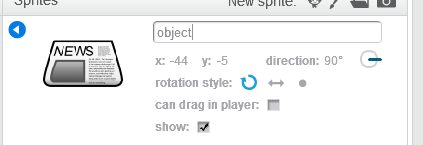
- Resize the sprite by clicking on the Shrink button at the top
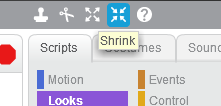
- Click on the Sprite in the main stage window several times, until it is smaller than the cat
Get the rubbish to fall from the sky
- Create a variable that will control the speed the rubbish falls, called speed
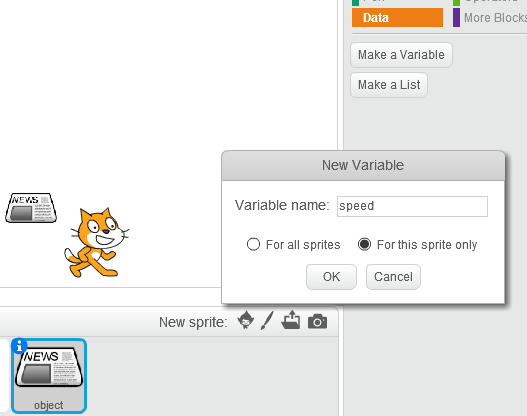
- Untick the variable so the value isn’t shown on the main stage
Create a custom block called reset that will set the speed to 0 at the start
![define reset
set [speed v] to (0)
hide](ba7782762d87ab872d39469728a019adbf0e6171.png)
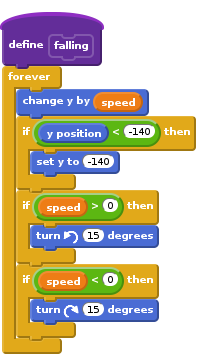
Create a custom block called falling that will make the object fall at this speed
Create a custom block called gravity that will make it speed up as it falls, but stop when it hits the ground
![define gravity
forever
if <(y position) > (-140)> then
change [speed v] by (-1)
else
set [speed v] to (0)
end](68f0b76995525505a4ff020f3dc794f3028fca57.png)
Create a custom block called choose object type that will choose a type of rubbish
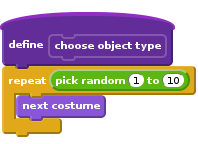
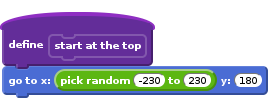
Create a custom block called start at the top that makes each new bit of rubbish start at a different place
Create a custom block called new object every four seconds
![define new object every four seconds
forever
create clone of [myself v]
wait (4) secs](2b73d4104ef385dfe59eea5c1aadce7423edda36.png)
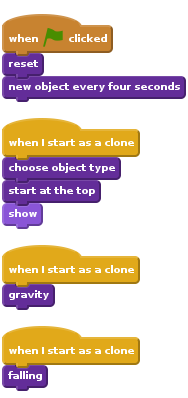
Bring it all together by creating the following script
Test Your Project
Click the green flag. The cat should still be able to run around, but now rubbish should rain from the sky, spinning as it falls.
Save your project
Things to try
- Try changing new object every four seconds to make rubbish fall more or less often
- Try changing gravity to change the speed that objects fall
Step 3: Carrying the rubbish
Now we want to make the cat to be able to pick up fallen rubbish and carry it.
Activity Checklist
Select the rubbish object sprite.
Create variables that will let us describe the different costumes of object
- Create a new variable, for this sprite only, called can
- Create a new variable, for this sprite only, called jar
- Create a new variable, for this sprite only, called newspaper
- Untick them all so they’re not shown on the stage
Modify the existing reset custom block so that it looks like this. The numbers should match the costume numbers for the sprite.
![define reset
set [speed v] to (0)
set [can v] to (1)
set [jar v] to (2)
set [newspaper v] to (3)
hide](1ee4f9ee29759b81fc54d51db02cf807a4c46529.png)
Create variables to control what the cat is carrying
- Create a new variable, for this sprite only, called nothing
- Create a new variable, for all sprites, called carrying
- Untick them both so they’re not shown on the stage
Modify the existing reset custom block, to include setting both nothing and carrying to 4. It should end up looking like this.
![define reset
set [speed v] to (0)
set [can v] to (1)
set [jar v] to (2)
set [newspaper v] to (3)
set [nothing v] to (4)
set [carrying v] to (4)
hide](d8c039061134e93639454f002ef76235d499497b.png)
Control how objects can be carried
Create a new custom block called wait to be carried that lets the cat pick up an object if it’s not already carrying something. This will include creating a new event to broadcast carry-change
![define wait to be carried
wait until <<(carrying) = (nothing)> and <touching [cat v]>>
set [carrying v] to (costume #)
broadcast [carry-change v]
repeat until <key [space v] pressed?>
go to x: ([x position v] of [cat v]) y: (y position)
end
set [carrying v] to (nothing)
wait (1) secs
wait to be carried](7af4dc621d2bb5e61f0d3f56ba73239b16f7138b.png)
Create a new script so each new piece of rubbish can be carried

Test Your Project
Try out your game again.
The cat can carry an item of rubbish, and will drop it when you press the space bar.
Save your project
Step 4: Throwing the rubbish
The next step is for the cat to be able to throw the rubbish it’s carrying into the air instead of dropping it.
Activity Checklist
Create a custom block called throw in the air
![define throw in the air
set [carrying v] to (nothing)
broadcast [carry-change v]
set y to (-139)
set [speed v] to (20)](c9078a9c8e9a5ad63f6cfed12454217da5e337bb.png)
Modify the existing wait to be carried block so that the cat throws the object instead of dropping it when you press space. It should end up like this.
![define wait to be carried
wait until <<(carrying) = (nothing)> and <touching [cat v]>>
set [carrying v] to (costume #)
broadcast [carry-change v]
repeat until <key [space v] pressed?>
go to x: ([x position v] of [cat v]) y: (y position)
end
throw in the air :: custom
wait until <(y position) > (0)>
wait to be carried](282811e4835457b42f7ecc39435e379e6149abc4.png)
Test Your Project
Try out your game again.
The cat can carry an item of rubbish, and will throw it in the air when you press the space bar. It will fall back to the ground and can be picked up again.
Save your project
Step 5: Creating recycling bins
Activity Checklist
Start by setting up a background for the bins.
- Click on Stage
- Click on the Backdrops tab
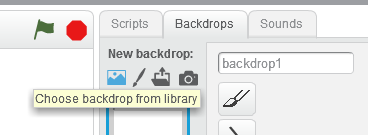
- Click on Choose backdrop from library and choose a background like boardwalk
- Delete the original blank backdrop ‘backdrop1’
Add bins to the background
- Click on Convert to vector
- Click on Import on the Backdrops tab
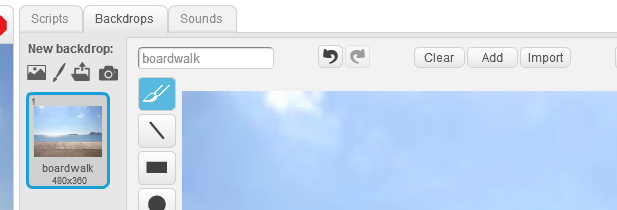
- Choose Resources/bin.png
- Click on Select
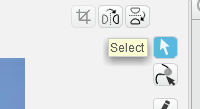
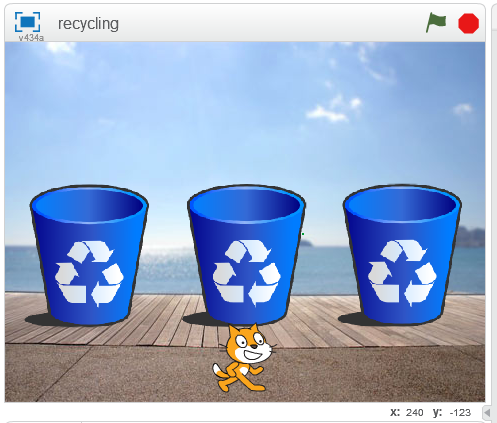
- Select the bin and move and resize it to put it on the boardwalk path
- Add two more bins so it ends up looking something like this:
Add labels to the bins
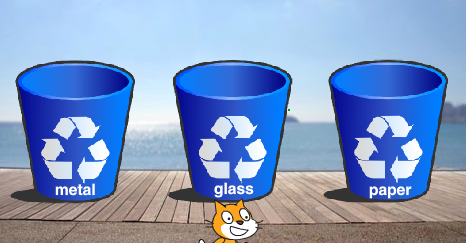
- Click on Text
- Add labels to the bins - one for metal, one for glass, one for paper
Add the bin openings
- Click on Paint new sprite
- Click on the Costumes tab
- Click on Convert to vector
- Draw a filled oval that matches the opening for one of the bins
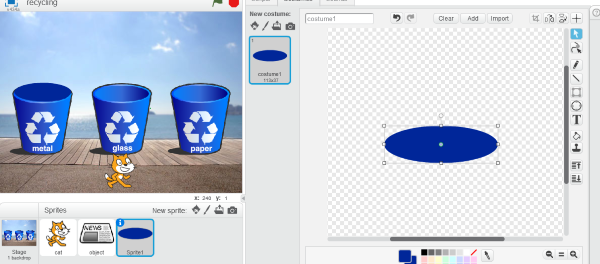
- Click on the blue
iand rename the Sprite to bin-can Add a script that draws the bin behind thrown rubbish

- Duplicate the sprite
- Call the duplicate bin-jar
- Move it to cover the second bin opening
- Duplicate the sprite again
- Call the duplicate bin-newspaper
Move it to cover the third bin opening
Get the rubbish to go in the bins
- Click on the object sprite
Create a new custom block called rubbish binned

Create a new custom block called go in the bin
![define go in the bin
repeat until <(y position) > (20)>
if <<(costume #) = (can)> and <touching [bin-can v]>> then
rubbish binned :: custom
else
if <<(costume #) = (jar)> and <touching [bin-jar v]>> then
rubbish binned :: custom
else
if <<(costume #) = (newspaper)> and <touching [bin-newspaper v]>> then
rubbish binned :: custom
end
end
end](1f131c0e725fa009471e48f6554c0e8c3b85b411.png)
Modify the existing wait to be carried custom block so that thrown objects can go in the bin instead of falling back down. It should end up looking like this.
![define wait to be carried
wait until <<(carrying) = (nothing)> and <touching [cat v]>>
set [carrying v] to (costume #)
broadcast [carry-change v]
repeat until <key [space v] pressed?>
go to x: ([x position v] of [cat v]) y: (y position)
end
throw in the air :: custom
go in the bin :: custom
wait to be carried](a5e8b173c2fa121cc4c6d2a6cfd52fbc367145d2.png)
Test Your Project
Try out your game again.
The cat can now throw items into bins. Items will only go into the correct bins, otherwise they’ll fall back down onto the ground.
Save your project
Step 6: Keep score
- Create a new variable, for all sprites, called score
- Move the score variable in the stage up into the corner
Modify the custom reset block in the scripts for the rubbish objects to reset the score to 0, so it should look like:
![define reset
set [speed v] to (0)
set [can v] to (1)
set [jar v] to (2)
set [newspaper v] to (3)
set [nothing v] to (4)
set [carrying v] to (4)
set [score v] to (0)
hide](2702908b38871662c5cec191b982231715f3fe2a.png)
Modify the custom rubbish binned block so that it adds to the score. It should look like:
![define rubbish binned
change [score v] by (1)
delete this clone](2c92b97e2b11acc11954dd49081a931b1a9c8029.png)
Test Your Project
Try out your game again.
The cat gets a point for every item that is put into the correct recycling bin.
Save your project
Well done, you’ve finished! Now you can enjoy your game!
Don’t forget you can share your game with all your friends and family by clicking on Share on the menu bar!


